Setting Up a Server (advanced)
Starting up your Eco server.[edit | edit source]
Welcome to the advanced guide.[edit | edit source]
Welcome to the advanced guide on how to set up your Eco Server and how to troubleshoot issues. Right now I am using the 0.7.05 beta. After launching your server successfully, a secondary window will open where all the following settings can be changed to your liking. If you have any questions or need additional help, then feel free to reach out to us at our Eco Discord server.
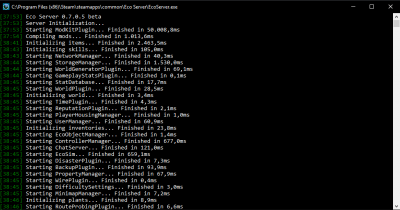
The first thing that will happen after you launch your server is this CMD opening. You can see the loading progress and any potential errors here.
Finding the config window.[edit | edit source]
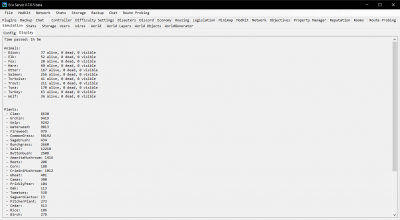
After the initial core has loaded you will get a second window - this is where all the awesome settings above can be changed.
Changing the world generation settings.[edit | edit source]
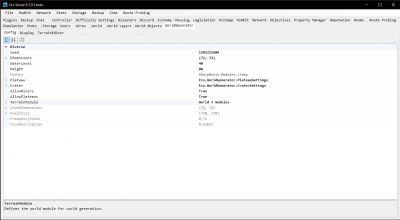
You can change the world size, seed and many other options on how your world will be generated in the WorldGenerator / Config tab.
Only certain world sizes are known to be stable.
Editing general permissions and settings.[edit | edit source]
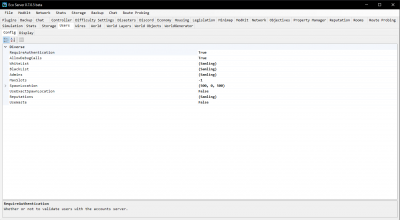
You can whitelist and blacklist users by their steam id or slg id in the Users / Config tab. To find an id for an existing player on your server, from in game you can use commands '/whoami' and '/whois username'. You can also add admins in the same way.
Editing maxslots has changed to network[edit | edit source]
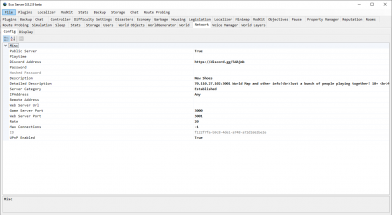
Editing MaxSlots has been moved to Network and is now called Max Connections
This determins how many users are allowed to connect to your server at a given time. Setting it to -1 will make it unlimited.
Configuring your Eco server.[edit | edit source]
This window will automatically open once you start your CMD.
Changing the default ports.[edit | edit source]
First of all, Eco servers default ports are 3000 for the Game connection and 3001 for the Web connection. You can change the default ports by going to the network tab and then select the config tab.
Connecting to your server.[edit | edit source]
You will need to find the IP that the server uses by going to Network / Display. Your external IP will be shown here. You can also optionally find your Public IPv4 via https://www.whatismyip.com/. Let's say that IP is 33.45.189.180. If you wish to manually connect to the server, you would have to type 33.45.189.180:3000 (3001 if using a version older than 0.7.4) - this is also called your game port. All server communication goes (by default) through the 3000 port - (game port). When adding your server to the client list you need to use the web port - this is used in voting for laws and so on.
Setting your server to public or private.[edit | edit source]
There is a setting under network / config called PublicServer. You can set this setting to True if you wish for the server to be shown in the public list. If you wish for your server to only be accessable for people on your network, you can set this setting to False. You can also password protect your server by typing in a password in the tab right below PublicServer.
Setting your server name.[edit | edit source]
You can set your server name in the Description tab in the network / config tab. You can type in your server name here - for example "Bexs Super Nice Server".
Backing up your server.[edit | edit source]
There is a small tab right beside Plugins called Backup. Go here, and you can change the backup frequency as well as how many backups the server should keep.
Detecting NAT settings.[edit | edit source]
For servers on or above 0.7.4:
As of 0.7.4 the server software uses NAT punchthrough and as such the server should always be able to punch through your firewalls, if this is not the case please contact support.
On version 0.7.4+ the network setting for NAT has been removed.
For servers below version [0.7.4]:
If true, the server will attempt to detect a NAT and create UPnP port mappings, allowing for easier external connections without manual port forwarding. This setting is recommended keeping as True. If UPnP auto portforwarding is not working as expected with Eco NAT, it is recommended that you turn this off by setting it to False and manually port forwarding all your ports instead.
Disasters settings.[edit | edit source]
Do you want to smash your world in a few days or disable it completely? Fear not! You can disable this by going to the Disasters tab and setting CreateMeteor to False if you don't wish any meteors to crush your world at all. If you, however, want it to spawn, you will have to set it to True. You can set the impact day by editing the (by default) 30 to a custom day of your choise.
Checking if your ports are open.[edit | edit source]
For servers above [0.7.4]:
You should not have to port forward as NAT Punchthrough should be able to ensure the ports are open.
Though if this is not the case please follow the statement for 0.7.4+ servers.
For servers below [0.7.4]:
You will need to open all the ports in your router and firewall for your server to be publicly accessable unless you have NAT set to true. There is an advanced guide on how to open down below. You can also check out the extensive guide on how to portforward your router at https://portforward.com/. You will then be met with a console status window (don't close this one or your server will shut down).
Folders and where to find them.[edit | edit source]
Your folder structure should look like this:
Main Folder / Builds - Here you can find your server exe.
Configs - Here you can find all your configs in .json text format.
Logs - Here you will find all your server logs.
Mods - All your mods are located here. This is also where you install your mods.
Storage - This is where the world data and user data is saved - If you want to reset your world and user data, simply delete all content in here.
WebClient - This is where the files for the law system web server are stored.
Setting up the network.[edit | edit source]
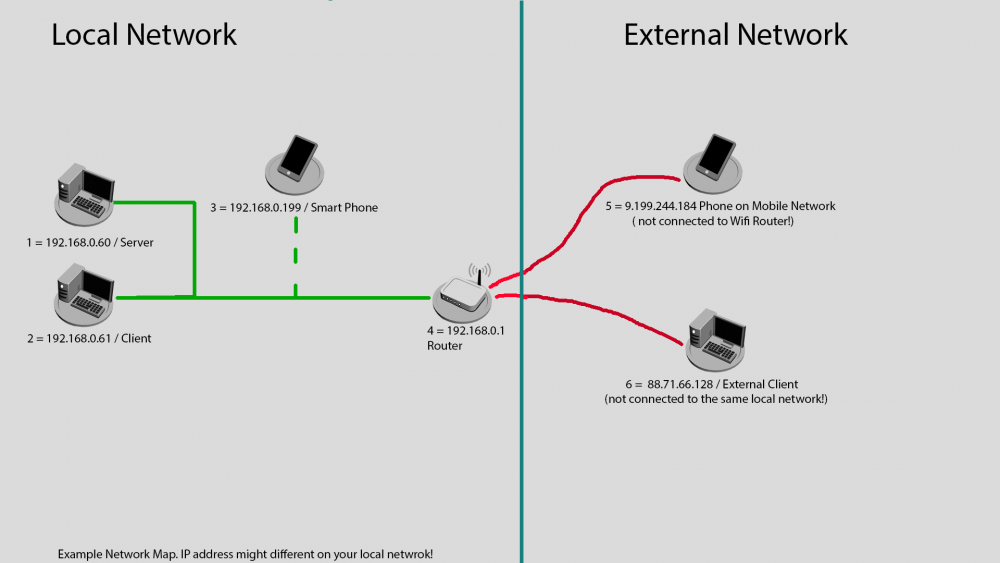
The map above is to help visualizing where we are on the network. Hosting a private server just for yourself only requires adding your Eco server to the Windows firewall - while public or private servers that other players outside of your home should have access to require configuration of your router. Since routers have different configuration methods and pages I'm unable to cover those but I will give an example on standard ASUS routers that are very simple. You will need to google how to forward ports on your own router.
Setting up the firewall on your server.[edit | edit source]
Third party Antivirus software and/or firewalls might still block ports even if you open them - Please configure those software or disable them as needed.
You will need to configure and open some ports before you publicly can start the Eco server.
You can find your firewall options in your control panel (on newer version of windows you can just hit the windows button and search for the firewall application).
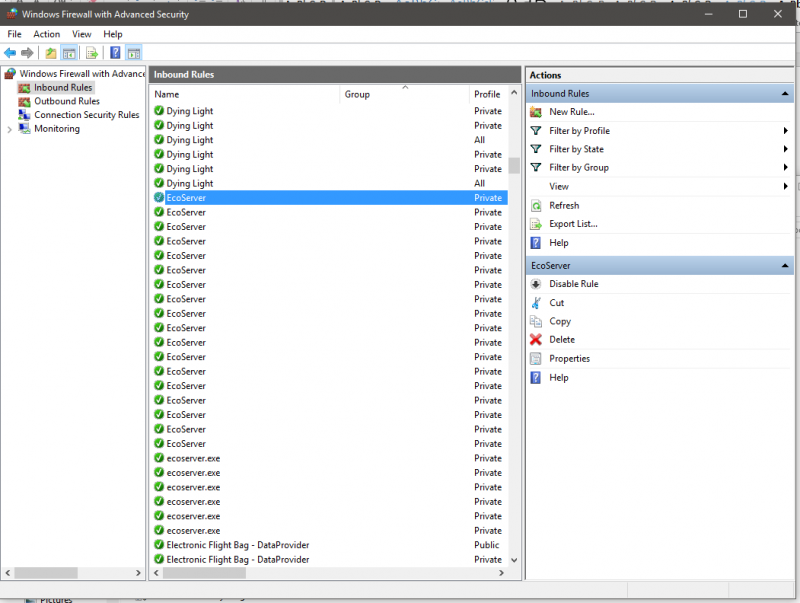
When opening the Advanced Firewall settings you are met with a screen that has a lot of rules by default. Please select the “Inbound Rules” and click the “New Rule…” button.
This will open a wizard. Here you should select that the new rule should be a port rule (Note that selecting the program later might cause issues when updating the server).
You should select TCP on the next page and give the rule a specific port range. This means if you need to open port 3000 and 3001 you should write 3000 – 3001 (see below).
On the next screen you select what to do with these ports. Here you should let the default “Allow the connection” stay and click to the next screen.
For the next screen let all items remain checked (All of them should be selected by default).
Finally you need you need to name your rule. Good naming practice now, will make it much easier to find the correct rule later; should you need to make adjustments.
Forwarding your router ports.[edit | edit source]
To give other people access to your server you need to tell your router how to handle incoming request from certain ports that come from an external computer.
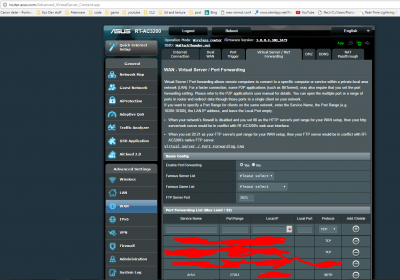
On an Asus router you can find these settings under Wan -> Virtual Server / Port Forwarding. ( I censored my own setup to keep my server secure but this should give some idea). First of all you need to set a name (Service name). The next item is the port range, on my router I would write 3000:3001 to give it the right range. Next item is the local IP - this should be your server IP. Leave the local port blank.
Troubleshooting errors and issues.[edit | edit source]
Insufficient rights.[edit | edit source]
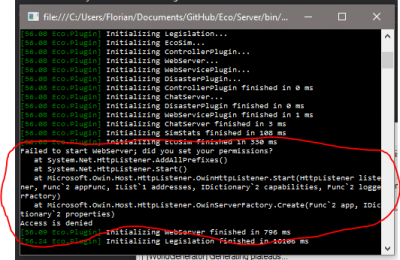
- If you are meet with the error message on launch, your server has insufficient rights and cant host the web UI. You can easily fix that by running the server as Administrator.
- Normally if you did the above as described you should now have a server that people could access. If not, you need to troubleshoot to find out where the issue is.
In case the webserver just wont start, it could be that your current user has not enough rights configured to create a webserver.
Try the following command in an elevated console (with admin rights)
netsh http add urlacl url=http://+:3000/ user=Everyone
Replace "Everyone" with either your domain and user, or the locale-dependant equivalent (e.g. for german it is "Jeder").
Unable to connect to the server.[edit | edit source]
- Check if your server is running properly. You can do this by opening your browser and typing in Localhost:3001.
- If your unable to see the your eco server site you might need to start the server as an administrator. Other possible issue can also be an outdated .net installation.
Its recommended to have at least .net 4.6.2 or higher. You can download .net 4.6.2 from here https://www.microsoft.com/en-us/download/details.aspx?id=53344 - Repeat the same thing but from a different computer or phone that is connected via cable or WiFi to the same local network. You will need to write the server address this time in your local browser instead of local host. In our case I would write 192.168.0.60:3000.
Unable to find the server.[edit | edit source]
- If you are unable to see the Eco server status page you have not opened your local firewall. Remember that antiviruses like AVG, Kaspersky etc. running on your computer that host the Eco server may still block your ports. Most antivirus programs allow configuring exceptions for games and other applications from their settings. Another cause could also be that you have not configured the right ports (in the future you might also need to open UDP ports instead of only TCP ports).
- So far so good. Most likely your local network is now working properly but other people can't still see your server. First of all check if you can access the server page again. For this you need a device or computer that is not connected to your local network. You also need to know your external IP address. You can find your external IP address by visiting for example whatsmyip.org from any device or computer on your local network. For example, if your external IP address is 77.77.77.56. I should try to connect via my external phone or computer with the web browser to the address 77.77.77.56:3000.
Unable to find the server.[edit | edit source]
- If you are able to connect but you cant see the server in the server browser you might have forgotten to set your server in the server configuration to public. This can be done via the Eco Server GUI under Network/Config/ServerIsPublic set to true. If you are unable to access the eco server status site from an external Device, you have most likely miss configurated your router and need to reconfigure or restart your router. There is not a lot more to this actually. In most cases it is this simple.
DS-Lite tunnel issues.[edit | edit source]
- One last thing. It seems that some people got a DS-Lite tunnel or other similar on there router, this unfortunately will make it impossible to to host a Eco server since open ports wont be forwarded in this network configuration. You can try to ask your ISP to give you a normal ipv4 address instead of an ipv6 tunnel with a shared ipv4 address by several customers like DS-Lite does.
Additional help and support.[edit | edit source]
If you have additional questions or issues please search and post on the Eco Discord server and if your issue is still unresolved, send an email to support@strangeloopgames.com or join our Eco Discord server.
